Struggling to choose the right buzzer for your project? Picking the wrong one can lead to silence when you expect a beep, causing frustrating delays and unnecessary debugging.
The main difference is that an active buzzer has a built-in oscillator and produces a sound with just DC voltage1, while a passive buzzer requires an external AC signal (like PWM2) to generate a tone. Active is simple; passive is versatile.
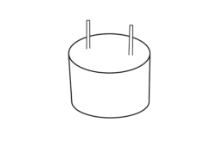
<sup id=](https://huarom.com/wp-content/uploads/2025/09/F4CU055L5XWJC25.jpg) 3 side by side" title="Active Buzzer vs Passive Buzzer" />
3 side by side" title="Active Buzzer vs Passive Buzzer" />
I get this question all the time. Many talented engineers and designers, even experienced ones like my client Jacky, hit this wall. They see two components that look almost identical but function in completely different ways. This confusion is normal. These components are not labeled clearly. But once you understand the one key difference, you will be able to choose the right buzzer for your needs every single time. Let's break it down so it makes perfect sense.
What is an Active Buzzer?
Do you just need a simple beep without complex coding? You might worry that generating a sound will take up too much of your microcontroller's processing power and time.
An active buzzer4 is a self-contained sound component with an internal oscillator. When you apply DC voltage, it automatically produces a tone at a fixed frequency5. You just need to turn it on and off, much like an LED.
An active buzzer is a "plug-and-play" solution. Think of it as a complete alarm system in a tiny package. It handles all the work of creating the sound wave itself. All your circuit needs to do is supply power. This is why I often recommend it for projects where simplicity and reliability are key. For example, if a PDA needs a confirmation beep for a barcode scan, an active buzzer is perfect. The code is incredibly simple: set a pin HIGH to make a sound, and set it LOW to stop.
Active Buzzer: The Simple Choice
The simplicity of an active buzzer is its greatest strength, but it also comes with a limitation. You cannot change the sound it makes.
- Ease of Use: It's the primary reason to choose an active buzzer. The simple on/off control makes it ideal for beginners and for applications where you just need one specific sound.
- Fixed Tone: The internal oscillator is set to one frequency, so you cannot play different notes or melodies. The sound is what it is.
Here’s a quick summary of its characteristics:
| Feature | Description |
|---|---|
| Internal Circuit | Contains an oscillator |
| Input Signal | Requires DC Voltage (On/Off) |
| Software Control | Simple digitalWrite(HIGH) / digitalWrite(LOW) |
| Sound Output | Fixed frequency and tone |
| Best For | Simple alerts, confirmation beeps, alarms |
For any device that needs a basic, unchanging alert, the active buzzer is the most efficient and straightforward choice.
What is a Passive Buzzer?
Does your project need different sounds for different alerts? A single, monotonous beep from an active buzzer might not be able to convey different levels of urgency.
A passive buzzer is essentially a tiny speaker that requires an external alternating signal to produce sound. You must provide a specific frequency (like a square wave from a PWM pin) to make it vibrate and generate a tone. This gives you full control over the pitch.
A passive buzzer gives you creative control. It doesn't have a brain of its own, so you have to provide the signal that tells it how to vibrate. This means you can make it play high notes, low notes, and even simple melodies. I worked with a client who was designing a medical device. They needed a soft, low-pitched beep for a minor notification and a loud, high-pitched, urgent sound for a critical alarm. A passive buzzer was the only way to achieve this with a single component. It requires a bit more effort in the code, but the flexibility is powerful.
Passive Buzzer: The Flexible Choice
This flexibility makes the passive buzzer a more versatile tool for user interfaces. You can create a whole sound language for your device.
- Total Control: You control the frequency, so you can play any note within the buzzer's range. This allows you to create rising tones, falling tones, and musical sequences.
- More Complex Code: You need to use a function that generates a frequency, such as
tone()in the Arduino environment. You need to specify both the pin and the frequency you want to play.
Here is a breakdown of its features:
| Feature | Description |
|---|---|
| Internal Circuit | Does not contain an oscillator |
| Input Signal | Requires an AC Signal (PWM / Square Wave) |
| Software Control | Requires frequency generation, e.g., tone(pin, frequency) |
| Sound Output | Variable frequency and tone |
| Best For | Melodies, distinct alerts, interactive audio feedback |
If your product needs to communicate different states or levels of urgency through sound, the passive buzzer is the superior option.
How Can You Tell If a Buzzer Is Active or Passive?
Are you holding a buzzer with no label, unsure what it is? Hooking it up the wrong way could lead you to think a perfectly good component is broken.
The easiest way to tell is to look at the bottom. A passive buzzer usually has an exposed green circuit board. An active buzzer is typically sealed on the bottom with black epoxy. You can also test it by connecting it to a 5V power source for a moment.
This visual check is my go-to method. The black sealant on an active buzzer covers its internal oscillator circuit. The passive buzzer doesn't need this, so you can often see the traces of its simpler printed circuit board (PCB). However, this isn't a 100% foolproof rule, as manufacturing styles can vary. The ultimate test is a quick connection to a power source, like a 5V pin and a ground pin on an Arduino or even a coin cell battery.
Two Simple Tests
If the visual inspection isn't clear, these two methods will give you a definite answer.
1. The Visual Inspection Method:
- Look at the bottom of the buzzer.
- If it is a sealed, black plastic bottom, it is most likely an active buzzer.
- If you can see a green circuit board6 with metallic traces, it is most likely a passive buzzer.
2. The Power Test Method: This is the most reliable way to know for sure.
- Connect the buzzer's pins to a DC power source (e.g., a 3V-5V battery or power supply). Make sure you connect positive to positive (+) and negative to negative (-).
- If it beeps continuously, it is an active buzzer.
- If it makes a single click or stays silent, it is a passive buzzer. The click is the membrane moving once in response to the initial power.
Using these simple tests, you can quickly identify any unlabeled buzzer and save yourself a lot of time troubleshooting.
Conclusion
Choose an active buzzer for simple, fixed alerts with minimal coding. Choose a passive buzzer when you need the flexibility to create different tones, melodies7, or variable alarms.
Understand the role of DC voltage in powering active buzzers effectively. ↩
Find out how PWM signals are essential for controlling passive buzzers. ↩
Learn about passive buzzers and their unique features that allow for more complex sound generation. ↩
Explore this link to understand the functionality and advantages of using an active buzzer in your projects. ↩
Learn why fixed frequency is a key characteristic of active buzzers. ↩
Understand how the circuit board design affects the functionality of passive buzzers. ↩
Discover the creative possibilities of using passive buzzers for musical applications. ↩
